
Downward Facing Dog — Adho Mukha Svanasana — is the pose you will meet on day one and keep refining for years. It shows up in nearly every class as a transition, a stretch and a brief rest all at once. It is also the pose beginners most often force, chasing flat heels and straight legs they do not need. This is the calm, clear version: what actually matters, the common mistakes, and how to make it work for your body today.
This is general guidance, not medical or personalised instruction — see a qualified teacher for hands-on help.
Downward Dog at a glance
| Sanskrit | Adho Mukha Svanasana |
| Level | Beginner-friendly (very adaptable) |
| Type | Standing / inversion · stretch + mild strength |
| Targets | Hamstrings, calves, shoulders, hands; lengthens the spine |
| Hold | 3–5 slow breaths to start |
| Props | Blocks under the hands; a non-slip mat helps a lot |
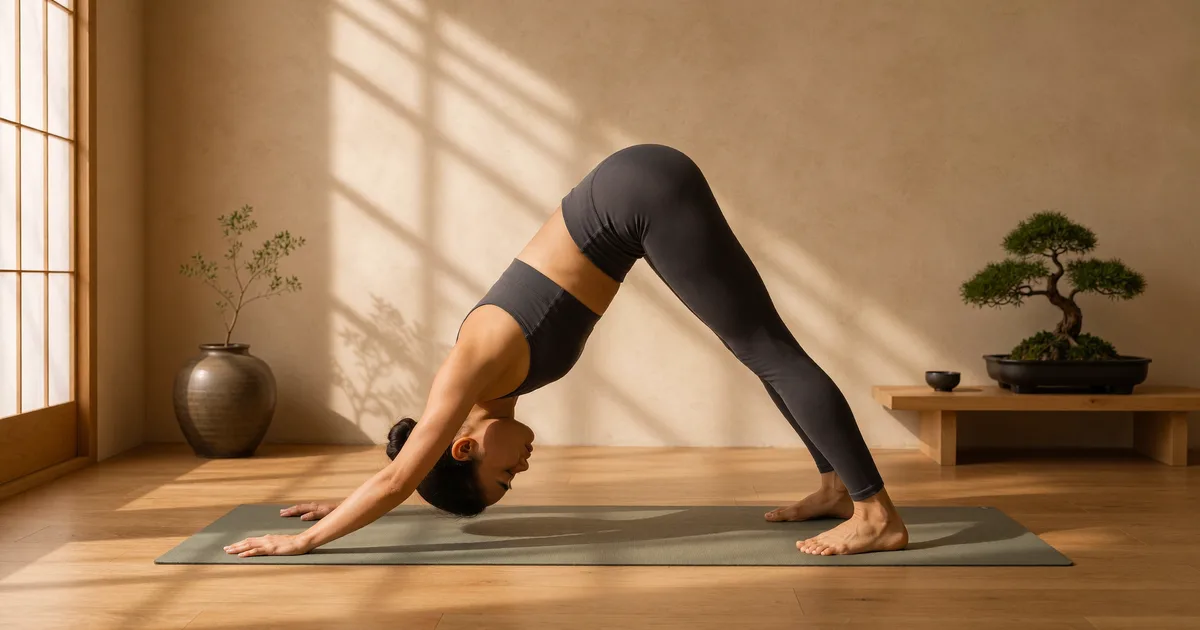
How to do Downward Facing Dog
Work through it slowly the first few times. The numbered cues match the breath-by-breath version most teachers use.
- Start on hands and knees in tabletop — shoulders over wrists, hips over knees. Spread the fingers wide and press evenly through the whole hand.
- Tuck the toes and lift the hips up and back on an exhale, keeping a generous bend in the knees to begin.
- Lengthen the spine — reach the hips high and draw the chest gently toward the thighs so the back is long and straight.
- Settle the legs and heels — straighten the legs only as much as feels easy, letting the heels reach toward the floor without forcing.
- Set the head and shoulders — let the head hang freely, ears by the biceps, shoulders drawing away from the ears.
- Breathe and hold — press the floor away, lift the hips, breathe slowly for three to five breaths, then lower the knees to release.
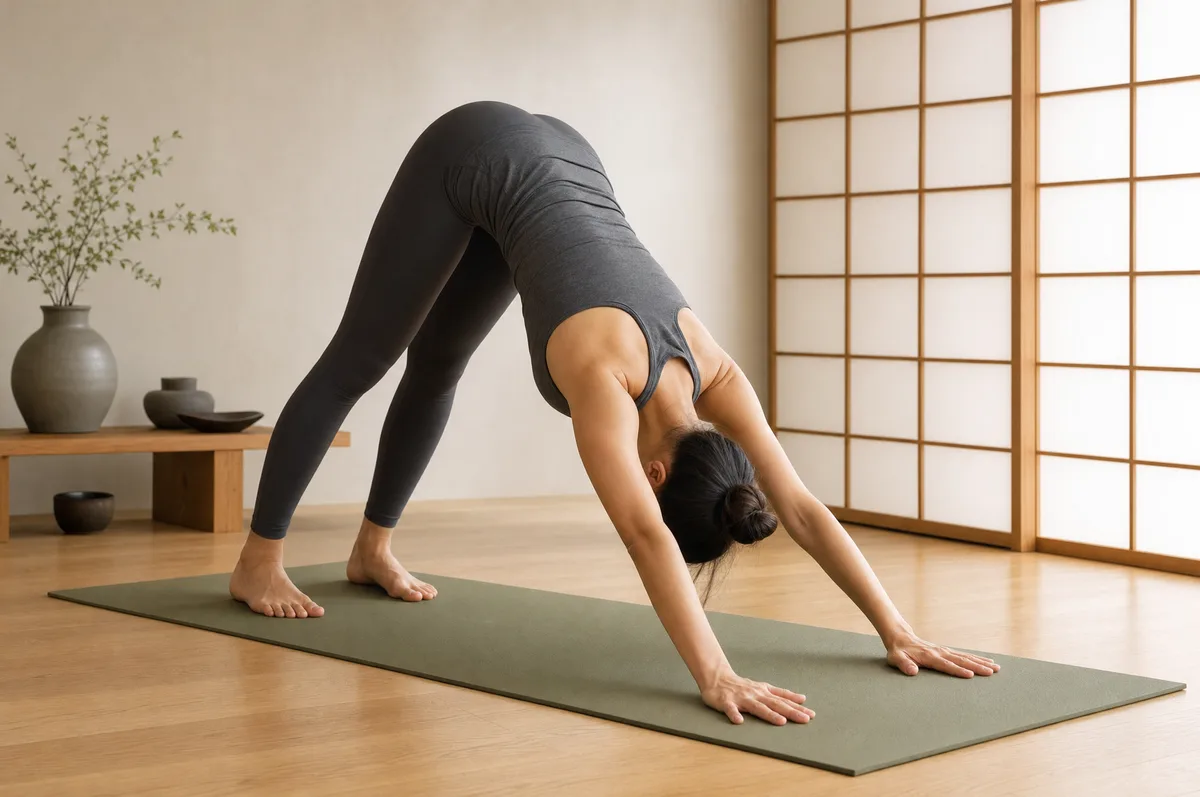
Common mistakes
- Rounding the back to force the heels down. The most common one. A rounded spine turns a back-lengthener into a back-rounder. Bend the knees and lift the hips instead.
- Dumping weight into the wrists. If your wrists ache, you are sinking into the heels of the hands. Spread the fingers, press through the knuckles and fingertips, and push the floor away.
- Shoulders creeping up to the ears. Draw them down the back and rotate the upper arms outward to make room at the neck.
- Collapsing the chest toward the floor. Sinking between the shoulders shortens the stretch and strains the shoulders. Gently press the floor away and let the chest move back toward the thighs instead.
- Feet too close to the hands. This bunches you up. Walk the feet back so the body makes a long, even inverted V, not a steep triangle.
- Holding the breath. It is a resting pose — let the breath stay slow and even.
Modifications and props
Downward Dog is endlessly adjustable. None of these are "lesser" versions — they are the right version for where your body is.
- Bend the knees generously. The single most useful adjustment for tight hamstrings. Prioritise the long spine.
- Blocks under the hands. Raising the floor takes pressure off the wrists and shoulders and helps you find length sooner.
- Hands on a wall or chair (an "incline" Down Dog). Gentler on the wrists and a good starting point if the full pose feels like too much.
- Dolphin Pose — drop to the forearms instead of the hands. It takes the load off the wrists entirely while keeping most of the spine-and-leg stretch, which makes it the go-to for sensitive wrists or carpal tunnel.
- Puppy Pose — from tabletop, walk the hands forward and melt the chest toward the floor with the hips over the knees. A calmer, kneeling alternative that opens the shoulders without bearing weight on tired arms.
- A wedge or rolled towel under the heels of the hands eases the wrist angle if the full extension pinches.
- Practise on a grippy mat. Hands and feet sliding apart is a real frustration in this pose — a mat with good grip makes a surprising difference, especially if you sweat (see best mats for hot yoga).
What it's good for
Done calmly, Downward Dog lengthens the back of the body — hamstrings, calves and spine — while gently building strength in the shoulders, arms, hands and wrists. It is a favourite after a long day at a desk: the pose helps release the tension that builds across the shoulders and back from sitting and staring at a screen. As a mild inversion it also brings a little fresh circulation toward the head and offers a quiet reset between more demanding poses. Treat it as a place to breathe, not a stretch to win.
Keep practising
Down Dog rewards patience more than effort — the heels may lower over months, or never, and either way the pose is doing its job. In a full beginner flow it is the seventh position of the Sun Salutation sequence, the rhythm most people first learn it inside of — and the pose you will keep returning to in almost every class.
Frequently asked questions
Is Downward Facing Dog good for beginners?
Yes — it is one of the first poses most beginners learn, and it is very adaptable. The trick is to prioritise a long, straight back over straight legs and flat heels. Bend the knees as much as you need; the pose works the same whether or not your heels reach the floor.
Why don't my heels touch the floor in Downward Dog?
Usually tight hamstrings and calves, not a mistake. Most people's heels never fully reach the mat, and that is fine — the heels lower over months of practice, if at all. Forcing them down rounds the back, which defeats the point. Keep a soft bend in the knees and let the heels float.
Why do my wrists hurt in Downward Dog?
Usually because too much weight sinks into the heels of the hands. Spread the fingers wide, press firmly through the knuckles and fingertips, and push the floor away so the load spreads across the whole hand. Shifting some weight back toward the hips helps too. If wrist pain persists, practise on fists or forearms and check in with a professional.
How long should I hold Downward Facing Dog?
For beginners, three to five slow breaths is plenty. It is a transitional and resting pose in a flow, not a pose to grind out. Build up gradually; quality of alignment matters far more than how long you hang on.